| III. Using Text Layers and Saving Files | |
| Creating and editing text options, saving your file. | |
| _textAndSaving.js |
|
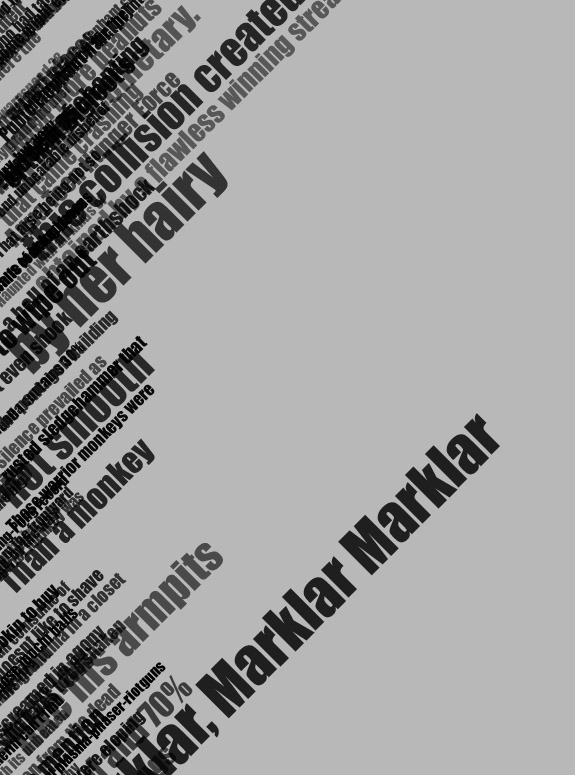
[The final image. Click on it for a larger version]
It already looks a tad more interesting doesn't
it ?
The keys in doing it are:
i. Code (explained below)
var defaultRulerUnits = preferences.rulerUnits;
preferences.rulerUnits = Units.PIXELS;
bgGrey = new SolidColor();
var lightness = 255 - Math.round(Math.random()*100);
bgGrey.rgb.red = lightness;
bgGrey.rgb.green = lightness;
bgGrey.rgb.blue = lightness;
backgroundColor = bgGrey;
var newDocumentRef = documents.add(600,900, 72.0, "Working With Text",DocumentMode.RGB, DocumentFill.BACKGROUNDCOLOR);
newDocumentRef = null;
var textArray = [
"Silence prevailed as",
"those mochi balls",
"screamed in agony",
"and unbearable disbelief",
"…"
] ;
var AD = activeDocument ;
for(a=1;a<=textArray.length;a++){
var TextLayer = AD.artLayers.add();
TextLayer.kind = LayerKind.TEXT;
TextLayer.opacity = Math.round(Math.random()*50)+50;
//TextLayer.name = textArray[a-1];
var txtRef = TextLayer.textItem;
txtRef.font = "Impact";
txtRef.contents = textArray[a-1];
txtRef.size = Math.round(1/(Math.random()*0.2+0.02))+10;
var textPosition = [0,Math.round(Math.random()*880)+10];
txtRef.position = textPosition; TextLayer.rotate(-45)
}
AD.flatten();
activeDocument.crop(new Array(25,25,600,800), 0, 600-25, 800-25, 72);
saveFile = new File("//scriptingTest.jpg");
saveOptions = new JPEGSaveOptions();
saveOptions.embedColorProfile = true;
saveOptions.formatOptions = FormatOptions.STANDARDBASELINE;
saveOptions.matte = MatteType.NONE;
saveOptions.quality = 9;
AD.saveAs(saveFile, saveOptions, true,Extension.LOWERCASE);
AD.close(SaveOptions.DONOTSAVECHANGES) ;
preferences.rulerUnits = defaultRulerUnits;

Note
Due to window sizes, the code above may not display properly (i.e. a line broken into two). To try the script take the one available for download rather. (there will be the full set of script available in a zip file at the end of the tutorial.)
ii. Code explanation
and syntax details
The code might look much more complicated but it really isn't.
I will not
go over the first steps that you should know from the previous script. The only
difference here is that I've declared a new color ('bgGray')
- I want the starting canvas to be a light gray. Now if you know how color
coding works, you'll notice that colors are in grayscale when their red,
green and red values are similar (255,255,255 is pure white and 0,0,0 pure black).
So to get my gray all I did was choosing a variable between 155 and 255 and
assign it to the red, green and blue color components.
'backgroundColor
= bgGrey;' sets the initial background color to the one we just
made - therefore we can use our new background color for the canvas color
'DocumentFill.BACKGROUNDCOLOR'
I assume you understand the rest, we just made a 600*900px canvas in 72dpi. The rest of the code might require clarifications:
var
textArray = [
"Silence prevailed as",
"those mochi balls",
"screamed in agony",
"and unbearable disbelief",
"…"
]
Note
I haven't written the whole array here because it is composed of 70 sentences. You can find it in the script download. FYI all of these sentences were not made by me, but by the psychedelic thread 'Neverending Story' at kirupaForum (where members post short sentences one after another and it makes up a whole weird story… take some time to read it !)
So this array is central piece of what we're doing. The script will draw parts of the array one after another and play with it to obtain what we want… You can put as many words / sentences / characters you want in your array, and as long as you wish - I thought 70 looked alright.
var AD = activeDocument
for(a=1;a<=textArray.length;a++){
var TextLayer = AD.artLayers.add();
TextLayer.kind = LayerKind.TEXT;
TextLayer.opacity = Math.round(Math.random()*50)+50;
//TextLayer.name = textArray[a-1];
var txtRef = TextLayer.textItem;
txtRef.font
= "Impact";
txtRef.contents
= textArray[a-1];
txtRef.size
= Math.round(1/(Math.random()*0.2+0.02))+10;
var textPosition = [0,Math.round(Math.random()*880)+10];
txtRef.position
= textPosition;
TextLayer.rotate(-45)
}
'var AD = activeDocument' - I could have written 'activeDocument' all the way long since we're not opening any other new doc, but 'AD' is much shorter. And since I am lazy...
'for(a=1;a<=textArray.length;a++)' we want all of our sentences to appear in the final piece, so we're going to go through the whole list ('textArray.length' outputs the length of the array, here it would output '70').
To create text layerm we will start off by doing the same thing that we did in the previous script: 'var TextLayer = AD.artLayers.add();' - we have here a normal layer who's object reference is 'TextLayer'. To transform it into a text layer, the code is 'TextLayer.kind = LayerKind.TEXT;'
Note
Once again you should check the Javascript Reference documentation to get to know other layerkinds, they include NORMAL, TEXT, HUESATURATION, BRIGHTNESSCONTRAST, LEVELS etc…)
The rest
is self explanatory, as most of scripting is; 'TextLayer.opacity'
will change the layer's opacity (here the random function return a value
between 50 and 100)
Notice that I commented out '//TextLayer.name
= textArray[a-1];' this is the name that appears in the 'layers'
window of Photoshop. I chose to give it the value of what's inside the
array. However Photoshop automatically fills text layer names as text layer
contents, so this would be done later on by Photoshop.
Note
You noticed that I used array[a-1] instead of array[a] - that's because arrays start at position 0, not 1. Therefore, even though my array size is 70, it only goes to position 69 (as much as it sounds bawdy)…
To fill in layer information such as size, font, leading, font color, justification (look for other items in the JS reference documentation), we're going to use the textItem of a text layer. Therefore the contents of the text layer will be 'textLayerName.textItem.contents = “blablabla”' or a variable. To shorten things up, I decided to declare a variable 'var txtRef = textLayerName.textItem' so that we can write, for example: 'txtRef.contents = …' instead of 'textLayerName.textItem.contents =…'
Fonts are somewhat special in Photoshop; even though you notice I only wrote 'txtRef.font = "Impact"' - you have to be careful because font names used in scripting are not the font names you see on the font list of Photoshop. Adobe in their documentation showed a nifty way to work out the font name - it's a one line code which you can place in a .js file.
You need to create your text layer, select your font and then apply the script:
ActiveDocument.activeLayer.textItem.contents = ActiveDocument.activeLayer.textItem.font;
As you can
see, it simply replaces the contents of the layer to its font name, all you
have to do then is copy paste the font name from the text layer to your script.
(note: notice here that you need to select an activeDocument and a text
layer, otherwise it won't work.)
Anyway, 'Impact' is a cool font, and is on both PCs and Macs, so
I kept that one.
'txtRef.size = Math.round(1/(Math.random()*0.2+0.02))+10' is a little math, but it's simply a way of choosing text size between 15 and 55, with more 'smaller' fonts than 'bigger' fonts - try visualizing the 'y=1/x' curve to understand…. I could have put a normal random function, do it if you want..
On to the positioning:
Note
You cannot position a layer directly in Photoshop (ie you cannot tell it to go to coordinates x,y) even though you can tell it to move to a certain number of pixels right and left and up and down. However, you can tell text layer to take a special position, the coordinates must be placed in an array.
Our first step is to create the random positioning for the y (x stays the same value), randomly chosen in values approximately as high as the canvas (keep in mind that you should play with all these values - it's the goal of it): 'var textPosition = [0,Math.round(Math.random()*880)+10]' outputs [0,number from 10 to 890]. The positioning syntax is 'txtRef.position = textPosition;' (textPosition is our array, not a function).
'TextLayer.rotate(-45)' then rotates that layer 45 degrees counterclockwise. Notice here that I'm using 'TextLayer' (the layer item) and not 'txtRef' (the text item).
The next steps are flattening the whole file (unnecessary since we're saving in jpg, but it's to show you how it's done):
AD.flatten();
activeDocument.crop(new Array(25,25,600,800), 0, 600-25, 800-25,
72)
saveFile
= new File("//scriptingTest.jpg");
saveOptions = new JPEGSaveOptions();
saveOptions.embedColorProfile = true;
saveOptions.formatOptions = FormatOptions.STANDARDBASELINE;
saveOptions.matte = MatteType.NONE;
saveOptions.quality = 9;
AD.saveAs(saveFile, saveOptions, true,Extension.LOWERCASE);
'AD.flatten()' simply flattens the file.
Since there are parts of our file which look a tad nasty because of positioning and rotating (the left of the image and the bottom look 'empty') we'll have to crop the document before saving it.

Note: Using the Crop function
[Here's how the crop function works]activeDocument.crop(array,var,var,var,var)
The first item is a four-point array containing the coordinates of 'a' and 'b' (topleft and bottomright which defines your selection). Then the second item is the angle, third the width (c), fourth the height (d) and fifth the resolution). If you have width or height items different than the distances between the coordinates of 'a' and 'b', you're image will be distorted. Same thing if you use an angle.
Saving might seem a complicated business at first: you have to declare a file in which you will save your file first: 'saveFile = new File("//scriptingTest.jpg")'
Note
In this example the file will be saved to your system drive; “C:\scriptingTest.jpg” for Windows and something like “Mactintosh HD:scriptingTest.jpg” on Macs, check the 'JavaScript File Object' documentation for more info. Notice the slashes are not the same that are used for windows folder system. Therefore if you want to save your file to let's say “G:\temp\image.jpg” you'll write 'new File("/G/temp/image.jpg")'.
You have
to declare your save options using proper syntax: first of all you need to declare
what type of save options they are, hence 'saveOptions
= new JPEGSaveOptions();' - you have to check the JavaScript
Reference docs for a list of all save options (JPEGSaveOptions,
BMPSaveOptions
etc…).
Here you can look at the options, they're pretty much self-explanatory.
You can change 'saveOptions.formatOptions
= FormatOptions.STANDARDBASELINE' to 'OPTIMIZEDBASELINE'
or 'PROGRESSIVE'…
when you use progressive however you must add: 'saveOptions.scans
= 3' 4 or 5.
The matte is what color your transparency areas should blend into (remember jpgs can't have transparency).
You have 13 steps of quality when saving jpegs (later on, check out the script at the end of the tutorial which saves your file with the 13 qualities to compare them)…
'AD.saveAs(saveFile, saveOptions, true,Extension.LOWERCASE);' will simply save the document to the place & file we chose, and with the options we wrote.
Here's the end of the script:
AD.close(SaveOptions.DONOTSAVECHANGES)
preferences.rulerUnits = defaultRulerUnits;
'AD.close'
will close the document, but we have to specify not to save it (usually Photoshops
asks you if you want to save the document before closing it - this is the same
thing).
The last step you should know about, sets the back the default units…
Well I hope the second script brought some light to you. Make sure to play with it, invent new crazy scripts. Here's a little variation of my script, take a look at the attached code!
|
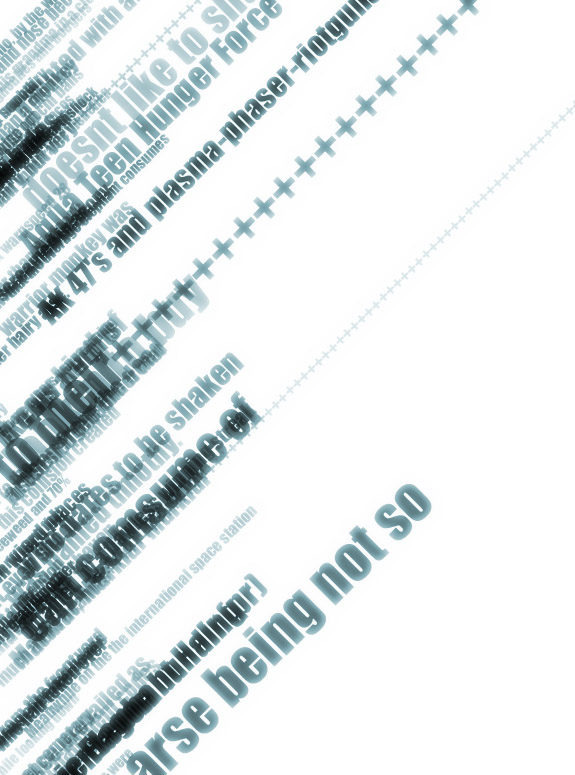
[ Here's what a modified version of the script
can do. Check it out !]
Had enough yet ? Try: Using Text File As Database, Using Filters & Actions
| page 3 /11 |
|
