| II. Documents and Layers | |
| Creating a document, using layers, using selections, using color objects | |
| _docsAndLayers.js |
|

[ Here's what you'll have produced by the end
of the script]
i. Code (explained below)
var defaultRulerUnits = preferences.rulerUnits;
preferences.rulerUnits = Units.PIXELS;
for(a=1; a<=3; a++){
var newDocumentRef = documents.add(200, 200, 72.0, "My New Doc N#"+a,DocumentMode.RGB, DocumentFill.WHITE);
newDocumentRef = null;
}
for(a=1; a<=3; a++){
activeDocument=documents[documents.length-a];
var curDoc = activeDocument;
var newLayer = curDoc.artLayers.add();
newLayer.name = "Square Layer";
var randomColor = new SolidColor;
randomColor.rgb.red = Math.round(Math.random()*255);
randomColor.rgb.green = Math.round(Math.random()*255);
randomColor.rgb.blue = Math.round(Math.random()*255);
var selectionBounds = [[75,75],[125,75],[125,125],[75,125]];
curDoc.selection.select(selectionBounds,SelectionType.REPLACE,0,false);
curDoc.selection.fill(randomColor);
curDoc.selection.deselect();
randomColor = null
for(b=0;b<=4;b++){
curDoc.layers[0].duplicate();
}
for(b=0;b<=5;b++){
curDoc.layers[b].rotate((b+5)*8);
curDoc.layers[b].opacity = 100-b*15;
}
//curDoc.activeLayer = curDoc.layers[curDoc.layers.length-1];
//curDoc.activeLayer.remove(); curDoc.mergeVisibleLayers();
}
preferences.rulerUnits = defaultRulerUnits;

Note
Due to window sizes, the code above may not display properly (i.e. a line broken into two). To try the script take the one available for download rather. (there will be the full set of script available in a zip file at the end of the tutorial.)
ii. Code explanation and syntax details
var defaultRulerUnits = preferences.rulerUnits;
preferences.rulerUnits = Units.PIXELS;
Photoshop saves your preferences (Edit>Preferences, ctrl-K for Windows users) each time you quit Photoshop. Since we are changing the 'Units' type from whatever it was to pixels, we want to do the opposite thing when the script will be over; that is, the script will have had no impact on your preferences. This explains why the script ends with: "preferences.rulerUnits = defaultRulerUnits"
Our ‘units type’ is set to pixels (it can be changed to INCHES, CM, PIXELS, check the reference for more on the unit types) – we can now create our three 200x200px canvases:
for(a=1; a<=3; a++){
var newDocumentRef = documents.add(200, 200, 72.0, "My New Doc N#"+a,DocumentMode.RGB, DocumentFill.WHITE);
newDocumentRef = null;}
Note
Some few lines of code change from different versions of Photoshop; the one minor thing that CS users must add is 'app' in front of everything that relates to the document/photoshop application in general. As an example, instead of 'preferences.rulerUnits', CS users must add 'app.preferences.rulerUnits' and instead of 'documents[0]' or 'activeDocument' must add 'app.documents[0]' and 'app.activeDocument'.
Hence the last line of the previous paragraph should be, for CS users; 'var newDocumentRef = app.documents.add(200, 200,...'
As you noticed I am creating 3 new canvases, hence the loop which tells Photoshop that, while the variable ‘a’ is smaller or equal to three (which means 1,2 and 3), a new document should be created. The structure of Photoshop Scripting is actually quite simple, but finding the right syntax can sometimes be a pain. In the example above you have to create a new variable (newDocumentRef) which becomes a new document, then set that variable to null (even though it’s unnecessary, we will do it to keep ‘clean’ variables).
Notice here
that ‘documents.add’
has six properties:
- Width
(in working units, here we had set working units as pixels previously)
- Height (in working units, here we had set it to pixels)
- Resolution (which must be in dots per inches, regardless
of the unit type you chose)
- Document name (to which we added “ N#"+a ”
so that our documents will be called ‘My New Doc N#1’, N#2 &
N#3 ).
- DocumentMode (can be RGB,
CMYK, GRAYSCALE, HSB or LAB)
- DocumentFill (can be WHITE,
BACKGROUNDCOLOR
or TRANSPARENT)
Note here that DocumentMode and DocumentFill do not necessarily need to be filled because 99% of Photoshop users already are in RGB and start with a white canvas – so you would code “documents.add(200, 200, 72.0, "My New Doc N#"+a); ”
Finally “newDocumentRef = null” keeps the variables clean as I told earlier, though you could omit that line of code.
You might ask, why am I creating a loop to create 3 canvases, then a loop to do the rest of the actions when I could do one big loop which does the whole process and repeat it. You might also ask why I am adding extra code which might look unnecessary (like the color mode or background fill) – well:
Note
In general in this tutorial I will add extra code or code actions in a longer way so that I can reveal as much as I can on the methods and functions, it is your job to remove what you feel you don’t need to lighten your code.
On to the code, we will now create the initial layer:
for(a=1; a<=3; a++){
activeDocument=documents[documents.length-a];
var curDoc = activeDocument;
var newLayer = curDoc.artLayers.add();
newLayer.name = "Square Layer";
This short code will help you understand how the structure of Photoshop works; you have your Application; which contains Documents, which in turn contain ArtLayers which can be text layers, normal layers, and layer sets (which include other text layers or normal layers).
You can refer to documents and layers by their respective numbers (of appearance in the application, so the first document created will be ‘documents[0] ’, the top layer will be ‘layers[0] ’) or by there names; which is why I name the current activeDocument ‘curDoc’ so I can refer to ‘curDoc’ in the rest of my code instead of activeDocument.
Tip
Name your documents and layers. With some scripts, you need to change the active document, for example when you copy paste layers from one document to another. In that case ‘activeDocument’ will not be the document you want to work with. Same with layers. You can name documents this way: ‘var yourDocName = activeDocument’ and layers ‘var yourLayerName = activeDocument.activeLayer’
You can also work backwards; if you want the active document to be for example, the first document you created, you will set the activeDocument variable to that of the name of the first document (in this case ‘documents[0] ’). Here’s a sample code, which will select the background layer (or last layer), of the last document you created:
activeDocument=documents[documents.length-1];
activeLayer=activeDocument.layers[layers.length-1];
Notice here the syntax. 'length' tells how many documents/layers there are, but Photoshop starts at layers[0] and documents[0] not layer[1] and documents[1], therefore, if you want the last document number is actually the total number of documents minus 1.
Back to
the code; ‘var
newLayer = curDoc.artLayers.add();’ will simply add a new layer
to the document (which we called ‘curDoc’ previously), ‘newLayer.name
= "Square Layer";’ simply gives a name to that layer.
Be careful though, it is not a reference name (which in our case is ‘newLayer’)
but the name you’ll see in the ‘layers’ window of your Photoshop.
You can change many variable such as blending mode (‘activeLayer.blendMode’),
opacity (we will use it later in the code: ‘activeLayer.opacity’),
check the JavaScript references which is given with the Scripting Plugin
for a full reference.
var randomColor = new SolidColor;
randomColor.rgb.red = Math.round(Math.random()*255);
randomColor.rgb.green = Math.round(Math.random()*255);
randomColor.rgb.blue = Math.round(Math.random()*255);
This is the syntax for creating a new color, you have to declare your color, and set rgb.red, rgb.green. and rgb.blue components (a number from 0 to 255 defined randomly here). Your color can also be in cmyk (and other color modes discussed earlier), in which case the components will be cmyk.cyan, cmyk.magenta, cmyk.yellow and cmyk.black.
var selectionBounds = [[75,75],[125,75],[125,125],[75,125]];
curDoc.selection.select(selectionBounds,SelectionType.REPLACE,0,false);curDoc.selection.fill(randomColor);
curDoc.selection.deselect();randomColor = null
Selections:
selections are defined by arrays (arrays inside arrays to be more specific),
that is, you have a big array which contains coordinates as in ‘[[75,75],[125,75],[125,125],[75,125]]’.
Photoshop will automatically close the path, so you don’t need to have
an ending coordinate the same as your first one. We are working here once more
in pixels, but it changes according to what unit type you have.
‘curDoc.selection.select(variables)’
tells Photshop to apply that selection, here again with several properties:
- Selection coordinates (arrays in an array)
- Selection type (REPLACE
replaces any current selection, but you can have INTERSECT
or DIMINISH or
EXTEND for the
respective effects)
- Feather radius (in pixels)
- Antialiasing (boolean, can be ‘true’ or ‘false’)
We’re now filling the selection with the color we picked before ‘curDoc.selection.fill(randomColor);’, then deselecting the current selection and ‘cleaning’ the color variable by setting it to ‘null’.
for(b=0;b<=4;b++){
curDoc.layers[0].duplicate();
}
for(b=0;b<=5;b++){curDoc.layers[b].rotate((b+5)*8);
curDoc.layers[b].opacity = 100-b*15;}
The first loop duplicates the layer five times (from 0 to 4, not 1 to 4), each time taking the top layer (‘curDoc.layers[0]’) as reference. Code is self-explanatory.
The second
loop (notice here I’m re-using the ‘b’ variable for the loop,
because the previous loop was finished) will rotate and change layer opacities.
Notice here that the loop goes from 0 to 5 and not from 0 to 4, because we have
the original layer (non-duplicated) to work with to (plus the background, which
makes a total of 7 layers).
Since we’re starting from the top layer (which will be the one with the
least rotation), we’ll give it the most opacity too, hence the ‘100-b*15’
which will start at 100 (100-0*15), and go to 25 (100-5*15) with steps of ‘15’.
Here’s the end of the script:
//curDoc.activeLayer = curDoc.layers[curDoc.layers.length-1];
//curDoc.activeLayer.remove();
curDoc.mergeVisibleLayers();
}
preferences.rulerUnits = defaultRulerUnits
Note
As you see in the snippet of code I've used '//' which turns the rest of the line into a comment. You can also use multiline comment tags: ' /* ' and ' */ ' for (as in ActionScript)
The code which is here turned into a comment was actually a code to remove the background layer (it’s the last layer, so its reference number is the number of layers in the document minus one), to do that, I set the current layer to last layer, and removed it. I could have changed that to a one line code: ‘curDoc.layers[curDoc.layers.length-1].remove();’
We can then
merge the visible layers with ‘curDoc.mergeVisibleLayers();’
– we could have used ‘curDoc.flatten()’
instead, but if you want a transparent background (by removing the background
layer in the code above), you’ll need to use 'mergeVisibleLayers()'.
Finally, to finish the script, we set the unit type to the one that was there
when you opened Photoshop.
This is the end of our first script. No big deal, you’ll say, but this is a simple insight to the powers of Photoshop. Imagine that you can turn this small-scale experiment into a huge one with many more options, working with many more files on a larger scale…
Doesn’t look creative? Check out this image made with minor modifications of the script (some of the new functions will be explained later on, but take a look if you’re curious!)
|
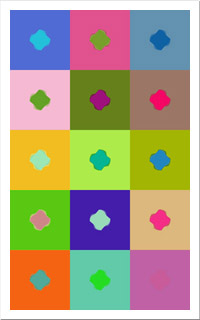
[ Here's what a modified version of the script
can do. Check it out !]
Hold on to your trousers, it's not over - next step: Using Text Layers And Saving Files
| page 2 / 11 |
|